Puffy Pancake Omelet

finished2

Growing up I loved making German Oven Pancakes. They only included a few ingredients, were super easy to throw together, and were a special treat I made for my brother and I. They are meant to be made in an oven, and I never thought about making them in a sandwich maker until the other day. I didn’t think they would puff up enough, but they turned out better than I expected. Instead of making a sweet version as is common, I decided to pair it with the ingredients I had on hand which included cheese (of course), veggies, and ham. I have made omelets before in my sandwich maker, but sometimes the egg flavor is too overwhelming for my taste. This recipe combines the best of both worlds.

The “pancake” batter is made first with just three simple ingredients.

egg2flourineggmilk

batter

A basting brush isn’t something most college students (even ones who really enjoy cooking) tend to keep lying around, so I improvised with a piece of broccoli which was used to grease the sandwich maker after I poured melted butter into the maker.

greasing

Only the bottom of the sandwich maker plate gets greased, and batter goes right on top of the butter.

battter

Topping options are endless, but I just used what I had in my fridge.

toppings2

Pile the toppings onto the pancake/egg mixture, and top with the rest of the egg mixture. It might get really close to overflowing, but the higher the batter, the better it cooks and the cleaner the omelets come out of the sandwich maker.

precook

Four mini omelets serve one person almost perfectly (unless you aren’t very hungry in the morning).

cooked1

PUFFY PANCAKE OMELET

Serves: 1

Prep Time: 10 minutes

Cook Time: 6 minutes

Pancake: 

  • 1 egg
  • 3 tbsp flour
  • 2 tbsp milk
  • 2 tbsp butter

Omelet Toppings: 

  • 1 tbsp shredded cheddar cheese
  • 1 tbsp feta cheese
  • 1 tbsp finely chopped broccoli
  • 1 tbsp diced ham
  • 1 tbsp diced onion

Combine the egg, flour, and milk. Melt the butter and pour equally into the different compartments of the sandwich maker. Use a broccoli floret to spread the butter around and evenly grease the sandwich maker plate. Drop batter by tablespoons into the maker. Top with each of the desired toppings, and complete with the remainder of the batter. Bake until the indicator light changes color or approximately 5 minutes. Let set for 1-2 minutes after the sandwich maker is turned off. Carefully take out and sprinkle with more cheese if desired. Eat fresh.

Energized Peanut Butter Banana Shake

finished1Ever get that mid-afternoon slump where you get out of classes, get done working out, or have to get ready for work, and you just wanna take a nap and eat a snack? Happens to me, like every day. I’m never hungry enough to eat a lot that close to dinner, and I need something quick to wake me up. Coffee is a usual go-to. Coffee is acceptable at any time of the day, or night…depending on how late I want or need to stay awake. As much as coffee appeals to me, sometimes drinking it on an empty stomach makes me feel a little sick. To solve this dilemma, I created a coffee shake. It fills me up, wakes me up, whips up quickly, and isn’t too sweet.

milkUsing straight up coffee in a shake or smoothie is always too bitter or too watery in my opinion. Instead of using brewed coffee, I blend whole milk with vanilla instant coffee. This helps the shake to have a creamier, sweeter taste and texture. Taster’s Choice Vanilla Instant Coffee by Nescafe is my favorite, but I’m sure alternative brands of flavored instant coffee would work as well.

blendingAlthough coffee adds a good pick-me-up, I decided to add peanut butter as a source of protein to provide sustained energy and a touch of sweetness. No, it’s not the same as a supplemental protein energy shake recommended after a workout, but for me, it works as a good alternative. Sure, peanut butter has sugar in it, but I don’t think it makes the shake too sweet. You can use natural peanut butter, creamy or crunchy versions, but I will admit that creamy Jif peanut butter is by far the best I have ever tried.

peanutbutter

Even if using a creamy version of peanut butter, I always had the problem of it clumping together in the shake and not getting equally incorporated. Fix this by microwaving it for 30 seconds. Then the peanut butter pours smoothly into the blender and gets evenly distributed throughout the shake.

peanutbutterpouring

readytoblendI add ice cubes, but it is the frozen bananas that help the shake to freeze and thicken without watering it down with too much. If you have never frozen bananas before, just do it. I recommend using slightly brown bananas and peeling them before placing them in a plastic bag in the freezer.

pouringThe results are a Frappucino-like beverage that is considerable less sweet and more balanced. Just don’t drink it too fast, or beware of a massive brain freeze to follow.

ENERGIZED PEANUT BUTTER BANANA SHAKE

Serves: 1

Prep Time: 5 minutes

Cook Time: None

  • 3/4 cup whole milk (or 2%, 1% or skim if you are like my friend Megan who really likes her milk to taste mostly like water)
  • 1 packet of instant vanilla coffee
  • 2 tbsp peanut butter (melted)
  • 2 frozen bananas
  • 6 ice cubes (or more if you want it thicker)

Blend the milk and instant coffee in the blender for 30 seconds or until completely incorporated. Pour in the peanut butter. Cut the bananas in half before adding in order to make it easier for the blender to chop everything up. Top with enough ice cubes to fill in the gaps between the frozen bananas. Blend everything together until smooth. Savor the taste and benefit from the energy.

Easy Creamy Potato Soup

soupfinished

The howling wind, fast accumulating snow, canceled classes, and snow emergencies offer the perfect opportunity to stay inside and cook. And what better comfort food to warm up with than steaming hot soup?

Soup is a typical dish for a college student, but most of the time it is consumed in a pre-made form direct from a can. I love soup, but the canned version in the store just doesn’t cut it for me. This is where the crock pot comes in. There are millions of recipes for potato soup, but this recipe came about from just throwing together everything I had in my dorm one day. Most of the ingredients I often have on-hand, so it is something I make frequently.

The veggies get chopped into relatively small pieces so they cook more quickly in the crock pot. I usually just add potatoes and carrots, but if you have other veggies such as onions or celery, feel free to add those as well. Sure, it takes some time to chop everything up, but it is well worth it to have fresh ingredients, and a cutting board doesn’t take up much room. I’m sure you have a little space left on your desk, and if you don’t…well…maybe you should be working on some of that homework. Well, start the soup first, and then you can do your homework while its cooking and be rewarded by a delicious meal after that 10 page paper is completed!

carrotschoppedpotatoes

The veggies go right in the crock pot to get stirred around with a tad bit of butter and spices for subtle flavor. I usually let the veggies cook in the crock pot by themselves for about a half hour or so before adding any liquid.

veggiesincrockpotFinally, add the chicken broth. There will be more liquid added later for the creamy part, so go easy on the liquid here or the soup will be really thin. I like a thick, hearty soup to actually feel like I’m eating something instead of slurping on broth the whole time.

chixbrothThe super cute measuring cups are from my roomie, Heidi, as an early Valentine’s Day gift this year. Yep, way better than chocolate! I couldn’t resist using them right away.

Once the soup has time to cook, the veggies soften, and the flavors blend, it is time to add the creamy part. Sometimes I just add heavy whipping cream to thicken the soup, but my favorite is to make a cream sauce and then add it to the soup for the last 15 minutes of cooking. It adds great flavor and consistency. Don’t add the cream part too early or the soup gets really greasy, and sometimes it thickens too much.

whitesauceI also highly suggest making the soup with chopped ham because that really adds a good dimension and flavor boost without a lot of spices, but if you don’t have any, you can still make the soup with good results. As it simmers away, the inviting aroma is a great distraction from the nasty weather, or the ever impending homework…either way…its delicious.

finishedcrockpot

EASY CREAMY POTATO SOUP

Serves: 6-8

Prep Time: 15 minutes

Cook Time: 4-6 hours

  • 3 medium potatoes
  • 15-20 mini carrots
  • 1/2 cup diced ham pieces (optional)
  • 1 tsp parsley flakes
  • 1 tsp salt
  • 1/2 tsp pepper
  • 1 tsp butter
  • 2 cups chicken broth

White Sauce

  • 1/4 cup butter (melted)
  • 2 tbsp flour
  • 1 cup 2% or whole milk

Chop the potatoes and carrots into 1/2 inch cubes while 1 tsp of butter is melting in the crock pot on high. Add the veggies and ham to the crock pot and stir with the butter, salt, pepper, and parsley. Let cook on high in the crock pot for 30 minutes, stirring every 10 minutes if able to. Add chicken broth until it completely covers the veggies and ham. If ham isn’t available, feel free to use chicken or bacon as substitutes. Let cook on low for about 4-6 hours depending on your crock pot. I use a 2 quart-sized crock pot, and this recipe fits in it perfectly.

After the veggies are soft, make the white sauce in a separate bowl by slowly adding the flour to the melted butter and whisking together. Add the milk. Pour the white sauce into the crock pot with the rest of the soup. (The soup will now be really close to the top of the crock pot.) Stir, and let simmer on low for about 15 minutes and then turn the crock pot off and serve.

Now that wasn’t too hard, was it? And, it’s a definite upgrade from ramen and canned soup!

Sandwich Maker Donuts: Adapt-a-Recipe

******Watch the video: Sandwich Maker Donuts

donuts

“You can really make donuts in your dorm room?” is a common question I get from people. If a vision of splattering grease or rolling dough and baking it in the oven are the only donut making options you have been exposed to, then the questions posed is definitely valid. Neither of these baking-methods are obviously dorm-cooking conducive, so an alternative method must me sought.

As I was baking deprived and craving donuts at the same time, I decided to take a crack at it. I have experimented making pancakes and banana bread in my sandwich maker, so I figured, “Why not try making donuts?”

While searching for ideas, I discovered a recipe for Cinnamon Sugar Donut Muffins posted on mykitchenintherockies.com. These donuts were baked in a conventional oven, but I decided to try making them in my sandwich maker anyhow.  The results were better than anticipated! I tweaked the recipe a little and added a chocolate version because I bought some Ghirardelli dark melting chocolate on sale the other day, and who doesn’t like chocolate-covered donuts? It is some of the most delectably smooth chocolate I have ever tasted, and it melts perfectly in the microwave well-suited for dipping. I only dipped half the donut in chocolate, but in hindsight, I would cover the whole things with dark, creamy goodness!

Since baking in a sandwich maker may be a new concept to many, I decided to create a Sandwich Maker Donuts Video in order to follow along. The recipe is also included below for further reference.

SANDWICH MAKER DONUTS (Chocolate/Cinnamon): Adapt-a-Recipe 

Serves 6 (depending on how hungry you are…)

Prep Time: 20 minutes

Cook Time: 20 minutes 

  • 1/3 cup butter (melted)
  • 3/4 cup sugar
  • 1 egg
  • 1/2 tsp salt
  • 1 1/2 tsp baking powder
  • 1/2 tsp nutmeg
  • 1/4 tsp cinnamon
  • 2 cups flour
  • 3/4 cup milk
  • 2 tbsp cream cheese

Dipping Option #1: Chocolate

  • 3/4 cup Ghirardelli chocolate dark melting wafers

Dipping Option #2: Cinnamon Sugar

  • 1/2 cup (1 stick) butter
  • 3/4 cup sugar
  • 1 tsp cinnamon

Stir together melted butter and sugar. Mix in the egg. Add the salt, baking powder, nutmeg, and cinnamon. Next comes the flour. Stir after this, but the batter will be really thick until you add the milk. Whip the cream cheese in a separate bowl and then combine with the rest of the batter. Drop batter by 1/3 cup into a cold sandwich maker that is greased with cooking spray. Cook until the indicator light changes color or for approximately 5 minutes. (It is better to over-cook a little than undercook them or they will stick to the sandwich maker and be a pain to peel off of the cooking plates.) Carefully take the donuts out of the maker with a knife or fork, and place on a rack or tray to cool. Cut in half if desired and dip in either of the toppings before transferring to wax paper to cool completely, or just to have a temporary place to set them before they get gobbled up by your friends.

For the chocolate, dunk half way, or completely into the chocolate.

For the cinnamon sugar version. Fully immerse the donuts in a separate bowl with the melted butter and then dip in the cinnamon sugar mixture which should be in a different bowl or shallow pan.

These are best eaten fresh, but left-overs are never usually an issue.

Alternative BLT Mini Panini

finishedpanini

I pretty much take anything that is free—especially when it comes to food. There is always a way to use ingredients even if they aren’t normally paired together…or they aren’t that appealing to me. Such was the scenario when Christina, one of the girls I was living with, moved out and left me with a bunch of random food items I would have never normally purchased. A few of the ingredients included: guacamole, roasted red bell peppers, and creamy swiss cheese. “I don’t even like guacamole,” I thought to myself. But, I really couldn’t afford to be picky.

What I could afford, however, was Jimmy John’s Italian bread. If you don’t already know about this, it is a college student essential. Just ask for day old bread—its only $.50…okay, $.54 with tax. But, lets be real, I could almost find that much change on the sidewalk during my trip downtown to buy the bread! You can use other bread if you don’t have a Jimmy John’s nearby, but just make sure it has a smaller diameter.

jjbread

Since I had the bread, I couldn’t resist making a sandwich because the grill plates on my sandwich maker allow me to make the most delicious panini. (If you don’t have a sandwich maker with interchangeable grill plates, I highly recommend it. You can purchase the kind that close completely so it doesn’t leak grease like a George Foreman grill does. I am allowed to have a sandwich maker in my dorm but not a George Foreman grill or normal panini press. Every dorm will have their own rules, so check on this before purchasing anything.)

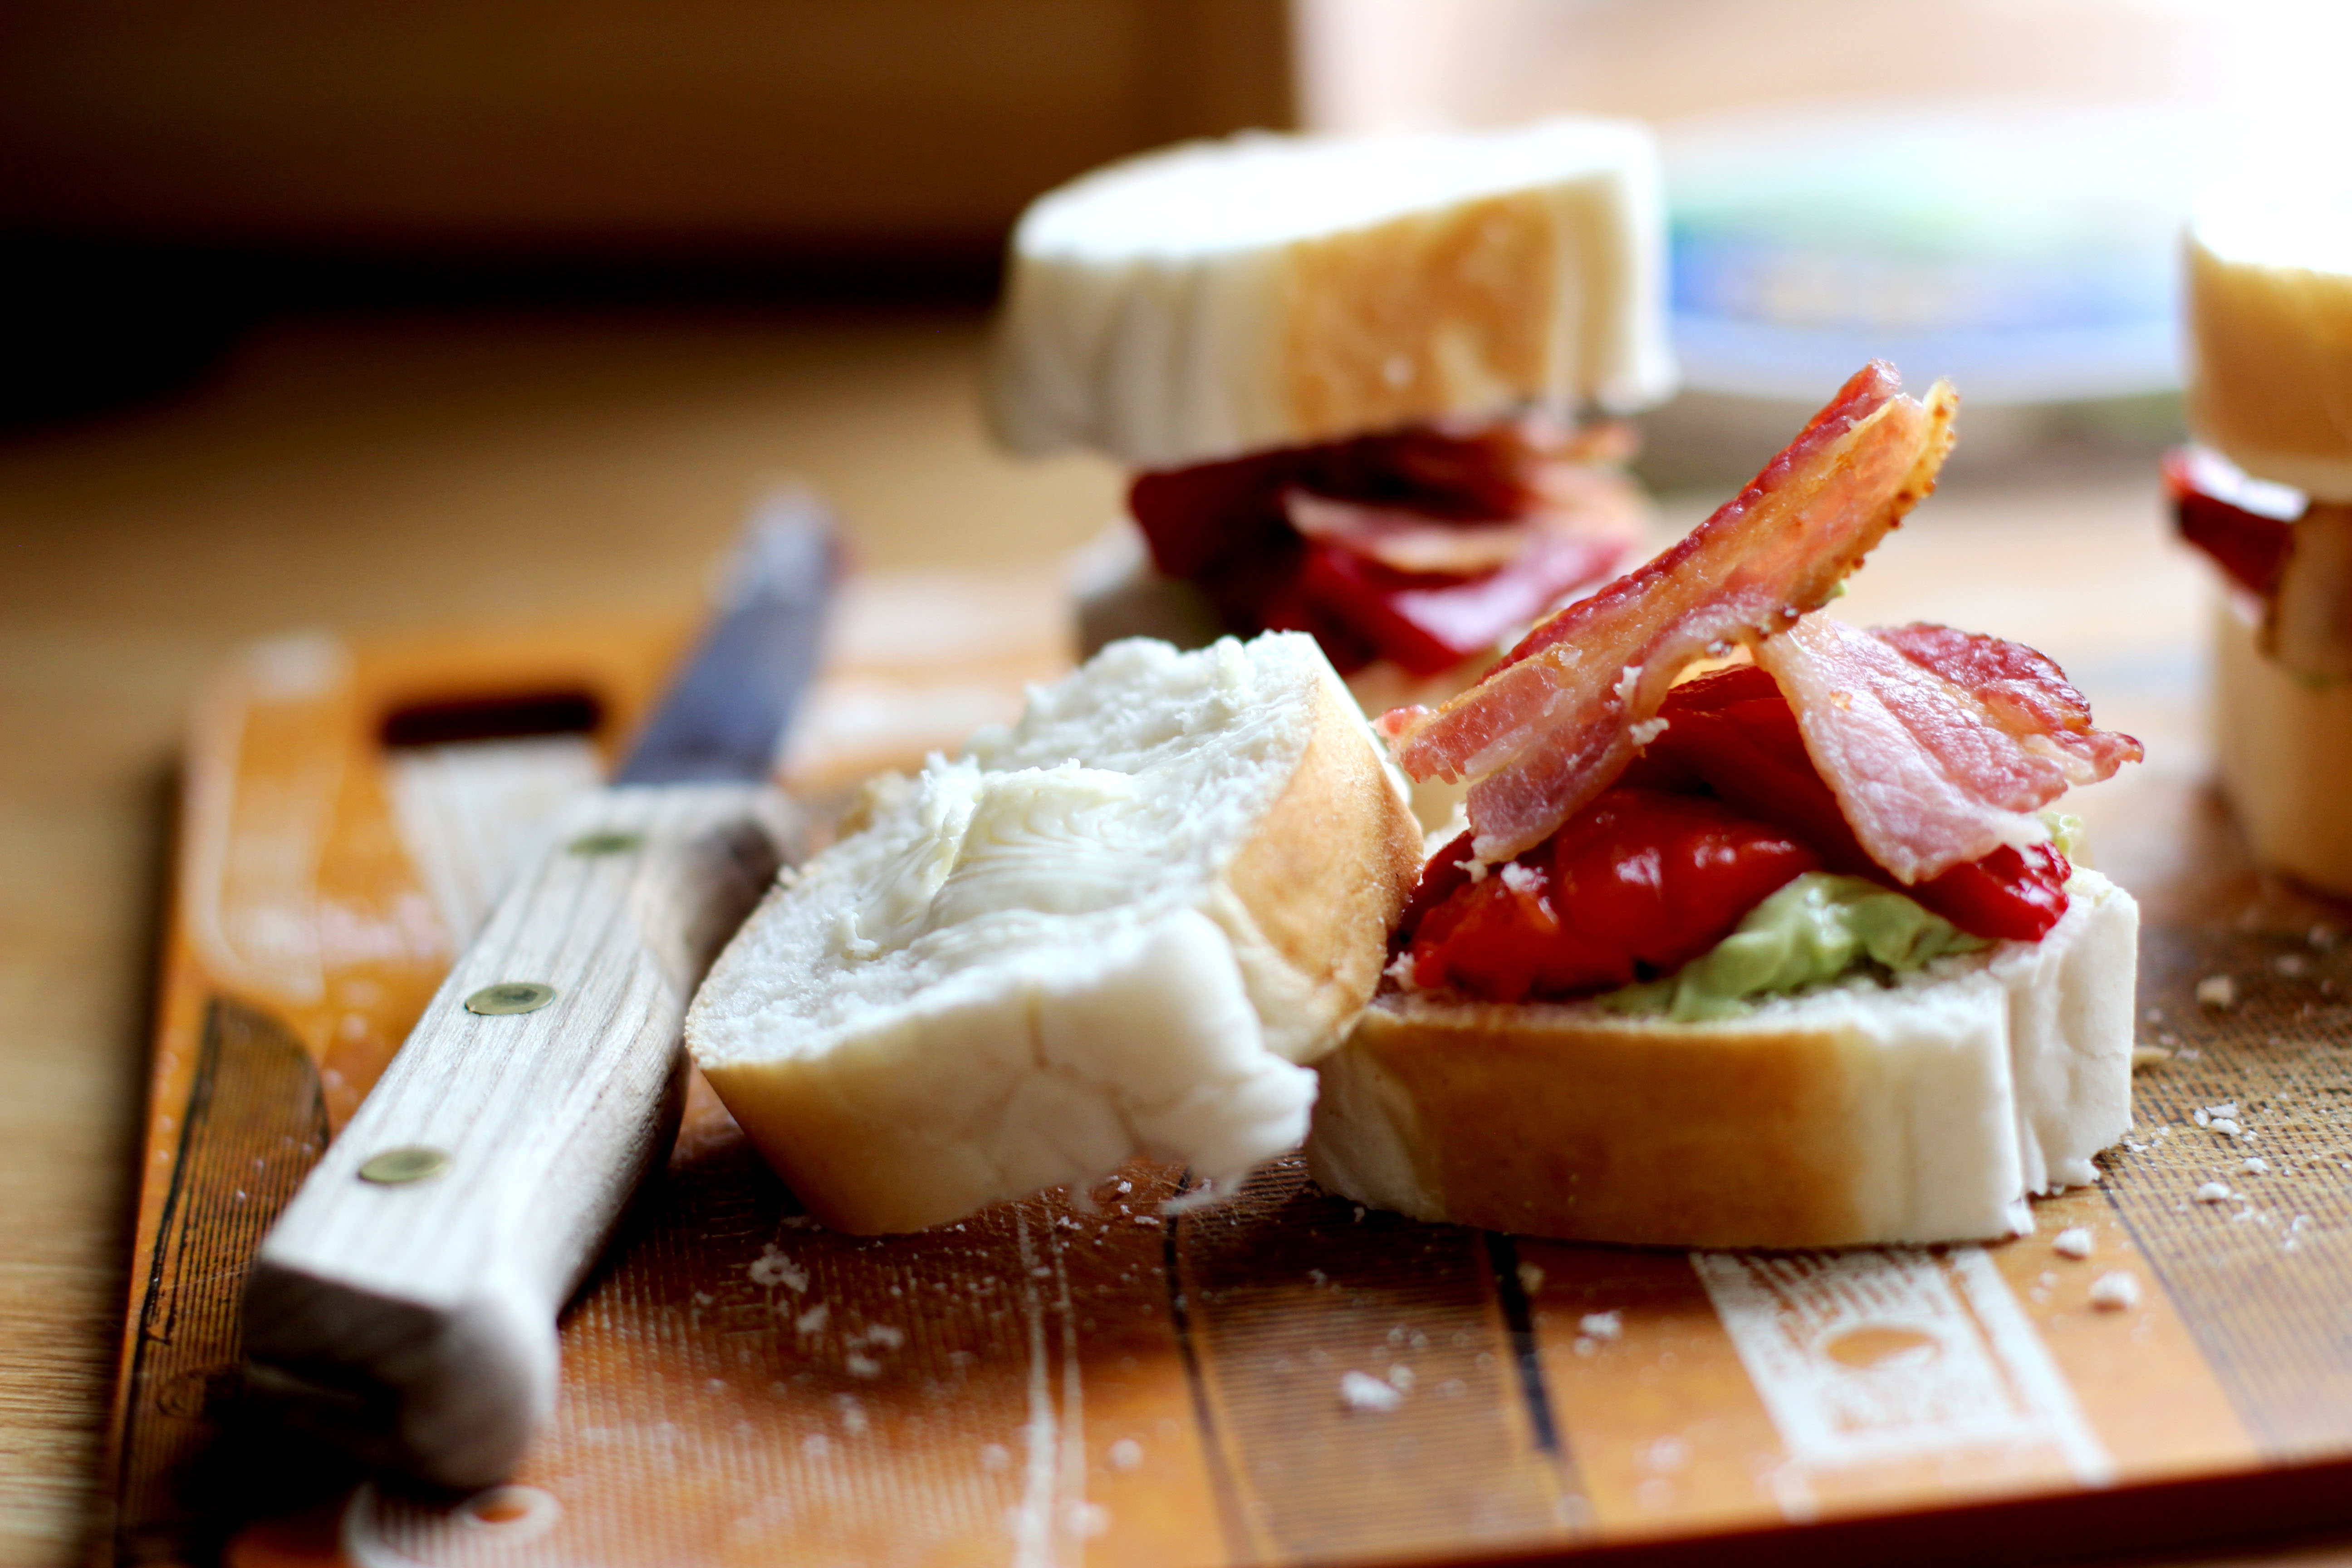
Personally, I don’t care for BLT sandwiches, but I decided to take the general idea and plug in the ingredients I had.

I didn’t have lettuce, but guacamole is green, so that seemed to be the best logical substitute which gets spread right on the bread.

guac

You can guess what’s next. Roasted red bell pepper, in place of the tomatoes. Both are red, so they look about the same. I’m not a fan of raw tomatoes, but bell peppers have been growing on me.

Oh, and you always have to add some cheese—one of my favorite ingredients. I never buy spreadable cheese, but it melts beautifully into the rest of the sandwich toppings. If  you can splurge on it, that is highly recommended. If you don’t have the spreadable swiss version, you can always use some other variety of cheese.

cheese

Last, but certainly not least…BACON. The phrase, “Everything is better with bacon,” is most definitely a fact in my book. It is a rare occasion that I have bacon on hand, but this was a lucky day. If you aren’t familiar with cooking bacon in a microwave, here are a few tips:

  • Make sure to use a microwave safe plate (I accidentally burned a hole through a roommate’s plate once because the bacon grease was so hot…needless to say, I replaced the plate and learned this tip the hard way…sorry Bekah.)
  • Line the bottom of the plate with two pieces of paper towel, layer the bacon in the middle, and top with two more layers of paper towel. Using approximately three slices of bacon at once has provided the most even cooking results in my experience, but this will depend on your plate size and microwave power. I recommend starting with one minute and 30 seconds and then adding more time in 30 second intervals after that until the bacon is golden and crispy.

baconcooked

Layer all the ingredients on the sliced bread. Yes, it is slightly a balancing act.

rawsandwich

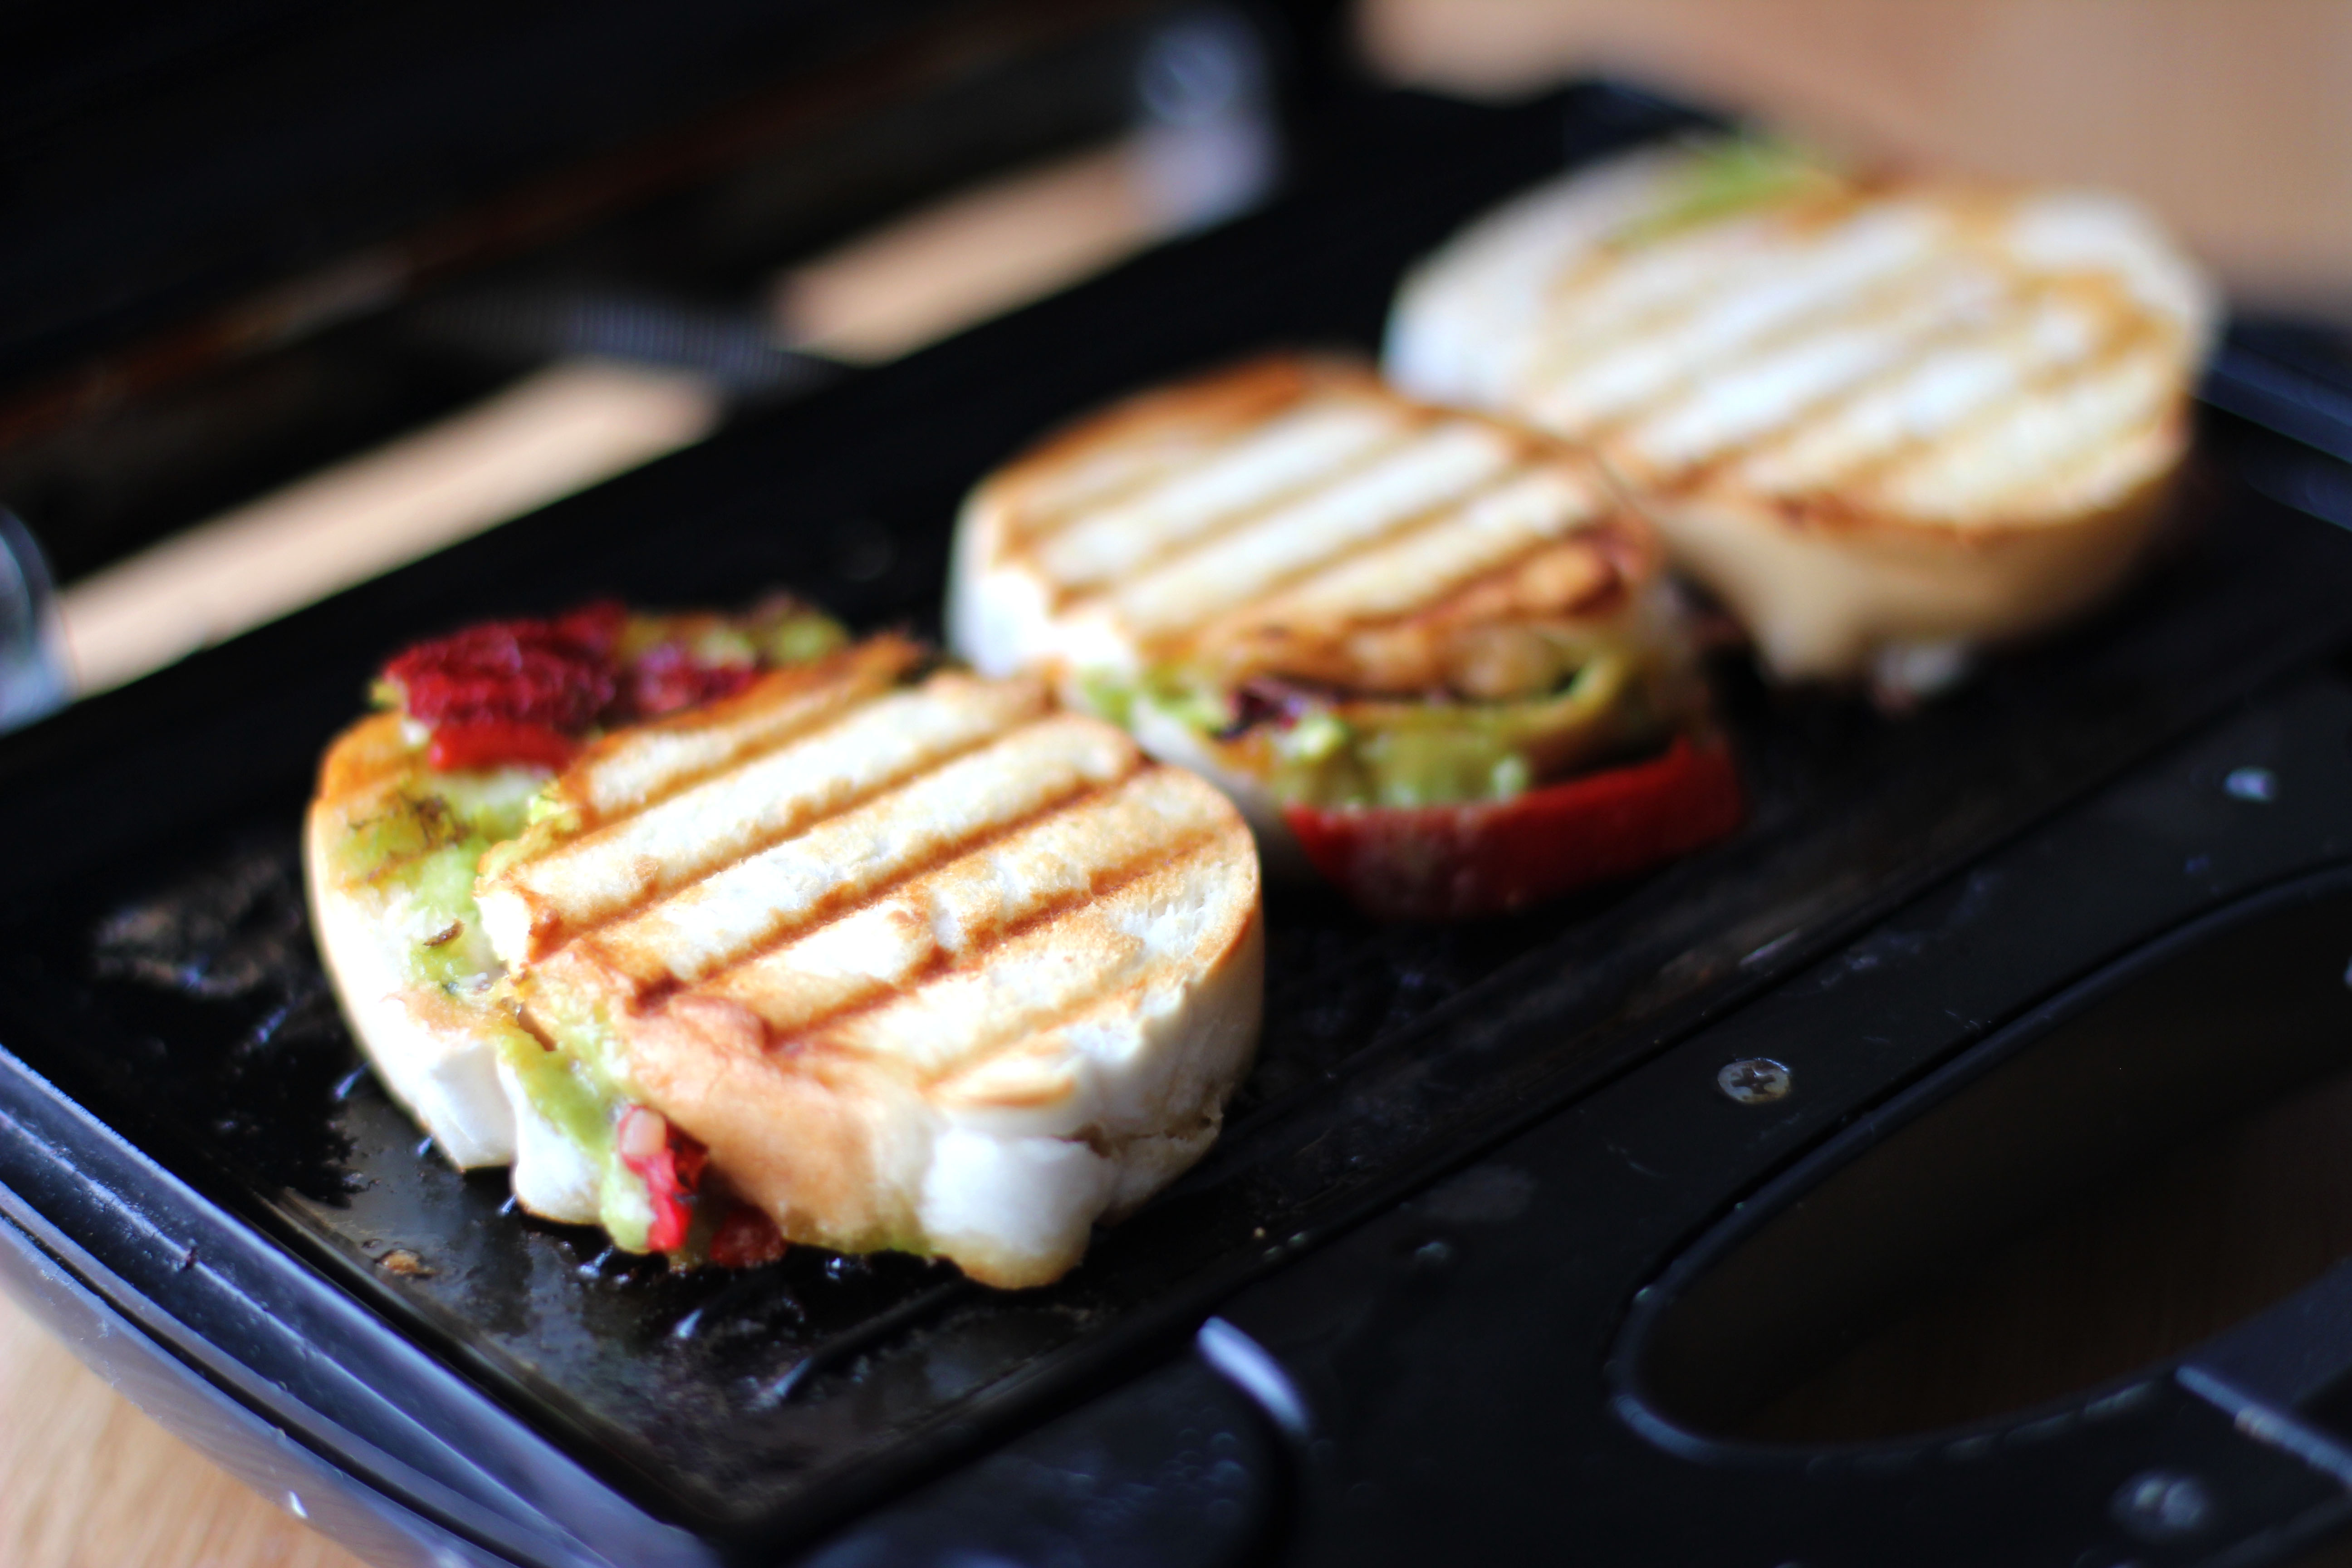
Depending on the size of your sandwich maker, three sandwiches usually fit at once. It is a tight squeeze to close the top, but this helps the outsides of the panini to brown well. Most sandwich makers have an indicator light to let you know when the food is cooked, and for my maker, that takes about four minutes. Once the sandwiches are cooked, leave them in the maker for a few minutes so that it doesn’t smoke profusely when you open it. (Setting off the smoke alarm in a dorm room is never a pleasant experience. My dorm always has a few false smoke alarms due to burnt popcorn every year. Don’t be THAT person.)

cookedsandwich

The goal is a tasty lunch, and I recommend trying this even if you don’t think you are going to like it. You never know till you try!

ALTERNATIVE BLT MINI PANINI

Serves 1

Prep Time: 5-10 minutes

Cook Time: 6 minutes

  • 6 slices 1/2 inch thick Italian bread
  • 1 tbsp guacamole (or guacamole dip)
  • 2-3 pieces of roasted red bell pepper, sliced into thin pieces
  • 1 (.67-.75 ounce) wedge of creamy swiss cheese (size of wedge varies based on brand: I have used both Crystal Farms and Laughing Cow and had good results with both)
  • 3 slices of bacon
  • butter for greasing the grill plates

Spread the guacamole on three slices of bread. Top those same pieces with roasted red bell peppers. Spread the cheese on the other three slices of bread. Break pieces of bacon in half and pile on top of the guac and peppers. Close sandwiches with other slices of bread. Grease sandwich maker grill plates with butter. Place sandwiches on the grill plates and tightly close the maker. Plug in or turn on the sandwich maker. Cook until the indicator light changes colors or for approximately four minutes. Unplug or turn off sandwich maker and let set for a few minutes. Open, and remove sandwiches using a fork or knife. Serve warm.